Helpful tips
You can use ordinary objects like scissors or a food fork to add interesting textures.
If you want to extend the activity over a longer period of time just wrap the clay in a plastic bag to keep it from drying out.
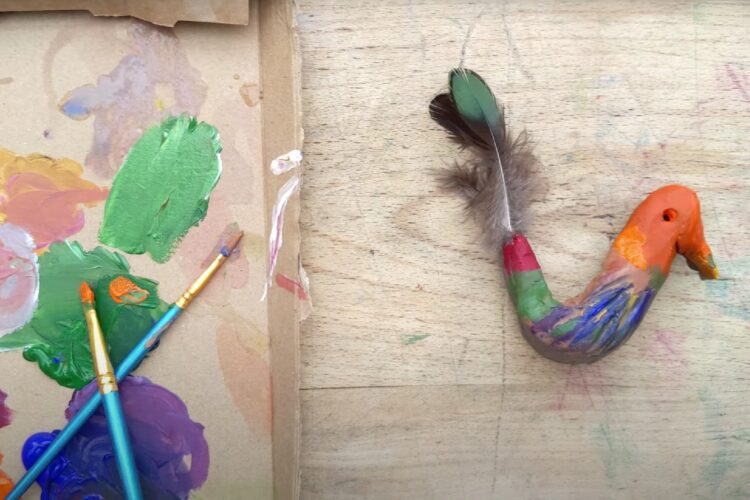
Learn how to make a bird out of clay that you can paint and decorate with natural materials
Making a clay bird is a wonderful, tactile activity that produces some beautiful results. The act of feeling and rolling the clay and using natural materials can be very calming and grounding.
If you can, collect natural materials from your own garden, or when outside on a walk. If you can’t do this, use indoor objects that create interesting patterns.
There are many ways that you can decorate your bird to bring it to life.
Plumage try sticking feathers on to represent wings, a tail, or a plume, alternatively, mark an outline of wings and score into the clay to give the impression of
feathers.
Eyes you can add eyes by pressing in the end of a stick, a paintbrush or pencil.
Adding colour Leave the bird to dry and after a week it will be ready to paint. You can use colours to represent a bird you know or add a range of colours for an imaginary bird.
Give your bird a name and bird call.
You might like to make a home for your bird. If so, take a look at our birds nest-making activity sheet
Helpful tips
You can use ordinary objects like scissors or a food fork to add interesting textures.
If you want to extend the activity over a longer period of time just wrap the clay in a plastic bag to keep it from drying out.